Oh my goodness it's been FOREVER!

We've been up to so so much at the E. appartment this summer, making jewelery, garage saling, house shopping, and even some sewing. (The sewing projects I've been working on will be featured in their own posts, but for now I wanted to share Dusca Lux.)

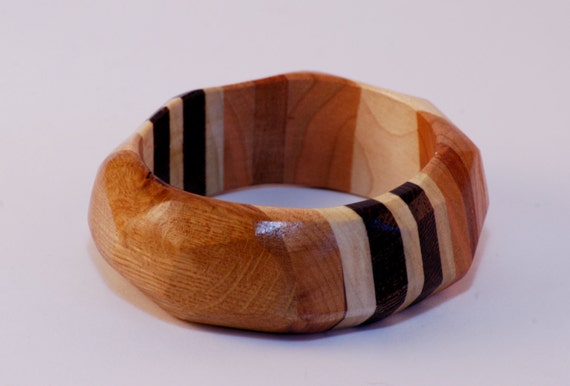
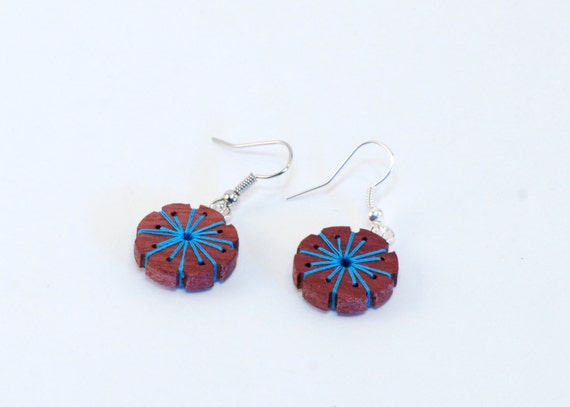
Earlier this spring we (mostly Josiah) had the brilliant idea to make jewelry together to sell online, at craftshows and local shops. The jewelry is composed of different types of wood and inlaid semi-precious stones such as mother-of-pearl and turquoise. Some of the wood we cut into flower shapes and then I embroider a "starburst" pattern onto them. 


Perhaps gainst our better judgement perhaps, we decided to push ourselves to be ready for the Dandelion Wine Fine Arts Festival in Waukegan, IL on June 6th. The show was a lot of fun! Directly below is the "flyer" I made to pass around social media, but the rest is self explanatory so I'll just shut up and post the photos. :) 


We also went to Arts and Crafts In The Park in McHenry, where we debued a bunch of new bracelet designs. Several of the new designs were a big hit. Unfortunately we were only able to stay for about half the show because the tornado sirens started going off and everyone was in a mad rush to take down their tents! There wasn't a tornado, but we did get torrential rain!


The "Guitar Necks" on the right are some of my favorite designs and they've been popular. People love that we are giving new life into unplayable old guitars and we love making them. 
The "Walk-Away Dress" had been on my list of things to make for quite some time. This reproduction pattern from Butterick (B4790) seemed like it would be a breath of fresh air after just having completed my labour-intensive wiggle dress. I had a whole afternoon set aside and my fabric and notions all picked out. I had some lovely purple and taupe plaid homespun. I liked the weight and texture - it felt "wholesome" and unfussy which is exactly what I intended this project to be. Little did I know...

The Walk-Away Dress consists of three pattern pieces and produces the effect shown below.


The front (the bottom part of the dress on the illustration) is wrapped around and secured in back. The back part (which is the bulk of the dress) is pulled around to the front and secured. Contrary to what the illustration seems to indicate, it is not gathered. It is a circle skirt. It is supposed to be incredibly easy to sew and finish. The legend goes that a woman can begin the dress after breakfast and wear it out after lunch. Psh. 


Well, I washed the fabric by hand and hung it outside to dry on the balcony of our apartment. I absolutely loathe the washer and dryer in our apartment complex. The washer leaves other peoples' lint all over your clothes (ew) and the dryer costs 25c. for 10 minutes. So we try to avoid using it if at all possible. I would just have to handwash and dry the finished garment. No big deal. To make a long story short, the fabric froze and Rae-Rae was very distraught. 


After my fabric had thawed properly, I laid it out to cut. Somehow, I didn't have enough fabric. Upon review of the pattern envelope, I realized I'd read the yardage wrong and that what I'd thought to be the yardage for view B, was in fact only part of the yardage for part of view A ...and well...My original intent was to make the dress entirely out of the homespun. Now I would have to find a secondary fabric (or, primary really...) as I'd gotten the fabric on clearance and I'd bought the rest of the bolt!

So to Joann I went, wandering the aisles, overheating in my coat and scarf, clutching a little scrap of fabric, no doubt looking like a lost dog. For a while I contemplated a "luxury" fabric to contrast the unindulgent nature of the homespun, but I couldn't bring myself to do it. (I found several luxury fabrics that I wanted to buy for other projects though!) Nothing quite made sense. I eventually settled on a wine coloured linen. The texture of the linen went nicely with that of the homespun and the colors miraculously worked together. The linen had a lovely weight as well, and opened the dress up for fall/winter possibilities.

The construction of the dress was simple enough, and went very quickly. Where I got hung up however, was on the seam binding. The first color I tried - brown - didn't work. I thought a cream would be the solution. Nope. So then I tried taupe. The taupe was just alright, and I'd managed to finish the majority of the edges with the dress with it when I realized I actually hated it. And I hated it even more than the brown I tried in the beginning! Then I found a lovely sew along over at edelweisspatterns.com for this dress where she uses double sided seam binding - as the pattern calls for - but she uses it to turn the fabric under so that the seam is only bound on the inside. 

It was so incredibly useful! I just wish I'd found her sew-along at the beginning of the experiment! (Please don't mind the bare feet or that I'm slightly  pigeon toed. It's an issue that I'm already aware of.) 


Overall, I'm alright with how the finished project turned out. I made a size 10 and made the darts larger. Changing the method of finishing the dress, did reduce the overall size however and I think next time I would start with a 12 and take it in slightly that way I have a little more ease... I would also make the dress entirely out of linen (or some other decently weighted fabric.) The homespun is a little too light and the inner layer tends to ride up during wear. I also like the idea of having a single fabric on the shoulders. The abrupt switch in pattern/texture I think might look a little clumsy. 

Last summer I had one of my greatest estate sale finds ever. I know I said the same thing about the mid-century club chairs but this was provably my other greatest find to date. It was actually at a semipermanent estate sale? I was with my parents at the time and my husband was at home. The whole scenario was just unexpected and I can't remember where the estate sale even was. If I come across it again some day I will be sure to let you know as it really is worth going to! There were vintage furniture items stacked in greenhouse garage structures, mirrors, magazines, ashtrays, model cars, giant stained glass pieces, lawn ornaments... The whole affair reminded me of that scene in The Labrynth where Sarah meets the Junk Lady. It was wonderful.


Anyway, I found the fur under one of vintage chairs, balanced on top of a dresser in its original box.

 The box graphic looks old, but other than that I don't know much. I couldn't locate any records on a "Rooz and Wind" furrier at 209 South State Street in Chicago, IL. For a while it just sat in its box, wrapped reverently? forbodingly? in a sheet (which is actually a very bad thing to do to a fur but more on that in a later post) while I hemmed and hawed about the ethics surrounding the situation. I eventually came to the conclusion that mending and caring for a vintage fur is not just okay, but the right thing to do. By destroying it, you are dishonoring the sacrifice that some poor creature made. It is wasteful. Now would I ever buy a new fur? No. That would be feeding into the need to produce more furs. (So screw you PETA, I am keeping my fur.)

Then came the task of identifying the fur. At first I wasn't entirely sure it even was fur. I had never touched real fur before let alone examined it. Thankfully, there is a wealth of resources out there on how to determine if a fur is real or faux.


Not to be vulgar, but the website I found the most helpful was actually the humane society's. (Let me qualify myself by saying that I have a lot of love and respect for the humane society and I completely understand the point they are seeking to make.) The test I found to be most helpful was the first one, where you examine the base of the hair to see if it is woven into the fabric or if it is attached as it should be on an animal. Do not doubt yourself if you ever have to do this, it will be incredibly obvious. 

There is another test you can do as well called a burn test, in which you actually singe a bit of the fur in a descreet spot (to see how it smells) but lacked confidence in my ability to only singe a small area and as I completely detest the smell of burnt hair... well, best not to I thought. 

Once I had determined the authenticity of the fur, I then had to determine what kind of fur it was. The Vintage Fashion Guild's fur resource was very helpful here in determining what I did not have. Having had such little exposure to fur, and being a very tactile person, I wasn't able to figure it out by looking at pictures and reading descriptions. I sought the advice of one of my dear friends who suggested I may have found a mink which is quite exciting! (When I think of mink I think of Lucy mooning over a mink coat in various I Love Lucy episodes)

Stay tuned for later posts on how I restore the fur and what I do with it!


Here we are, mid-February 2015. I don't know about you but most of my resolutions have gone by the wayside already. I think the problem is the sorts of goals I set for myself. "Sew more" or "work out more" or "take in less garbage." Goals like this are discouraging because, if you are like me, then you never sew "more" because you've never sewn enough to merit having sewn "more.". Does that make sense? (Seriously though, I do need to sew more...) 

Anyway, I digress. So instead of having the resolution "sew more" or "make more things," I am going to instead set a goal of one project a month. Some of you serious sewers out there are laughing at me right now, but that's okay. I also work full time and I'm in school, and I actually probably don't need to justify myself at all... But I would rather have an attainable goal of one project a month than set a high one and fail miserably. I'd also rather feel satisfied that I have a really solid creation than feel like I've just rushed through a bunch of half-assed creations. This means that I'll be posting here at least once a month, but I will obviously try to post more frequently. 

Also, I have the pleasure of announcing that I will be offering sewing services, starting now. Some of you already have custom made items, so please send pictures and I'll put them up! I would be delighted to create a custom garment or other project for you, handle basic alterations, as well as provide you with sewing lessons should you want to learn to do those things yourself. Contact me at alysa.eidmann@gmail.com if you are interested. Once I have pricing and a list of services offered they will go under the "Services" page below the new banner. 

Astute readers will notice that I've done a bit of rebranding. Let me know what you think as well!


Alysa Eidmann. Powered by Blogger.

Search This Blog